You probably have many questions running through your head as you prepare your car for a new paint job or touch up. The process of sanding and painting can be complicated. You want to do the job well the first time and avoid making mistakes that will cost you more time and money to fix.
Sanding is an important part of touching up your car’s paint, but if done incorrectly or on the wrong layer of paint, you can waste time and even need to redo the work completely. In this article, we’ll answer your questions about sanding your car between touch up paint coats.
The Layers of Car Paint
Knowing the layers of car paint and their purposes leads to a better understanding of the painting process. There are five separate layers to a car’s paint job:
- Wax
- Clearcoat
- Basecoat
- Primer
- Metal
Wax and clearcoat are the protective layers of your car’s paint job. The basecoat is the color of your vehicle, while the primer acts as a bonding agent between the bare metal of the car and the basecoat. Knowing where the layers are located will help you down the road when you’ve got sandpaper in your hands.
Understanding Sandpaper Grit
When purchasing sandpaper for any project, you will notice that you have many choices when it comes to grit numbers. This number rating indicates how rough or fine the sandpaper’s abrasive materials are. The higher the number, the finer the grit, and the smoother the finished surface will be.
Touching up your car’s paint requires a variety of different sandpapers for certain tasks. For example, if your car has rust, you would use a coarser sandpaper to remove the damage. If you were simply trying to smooth out a scratch, you would use a finer grit to level the surface area and prepare it for paint.
Before You Begin
Before beginning any painting project on your vehicle, it is imperative that you clean your surface area. You want to remove any dirt or grease that could hinder paint from binding properly or cause lumps and bumps under your paint job.
We recommend using an automotive soap designed specifically for cleaning cars. After washing, allow your car to dry completely, and check again for any dust or dirt that may have settled on the surface. Sandpapering over dirt or grime can cause scratches, resulting in an uneven surface for paint application and even rusting.
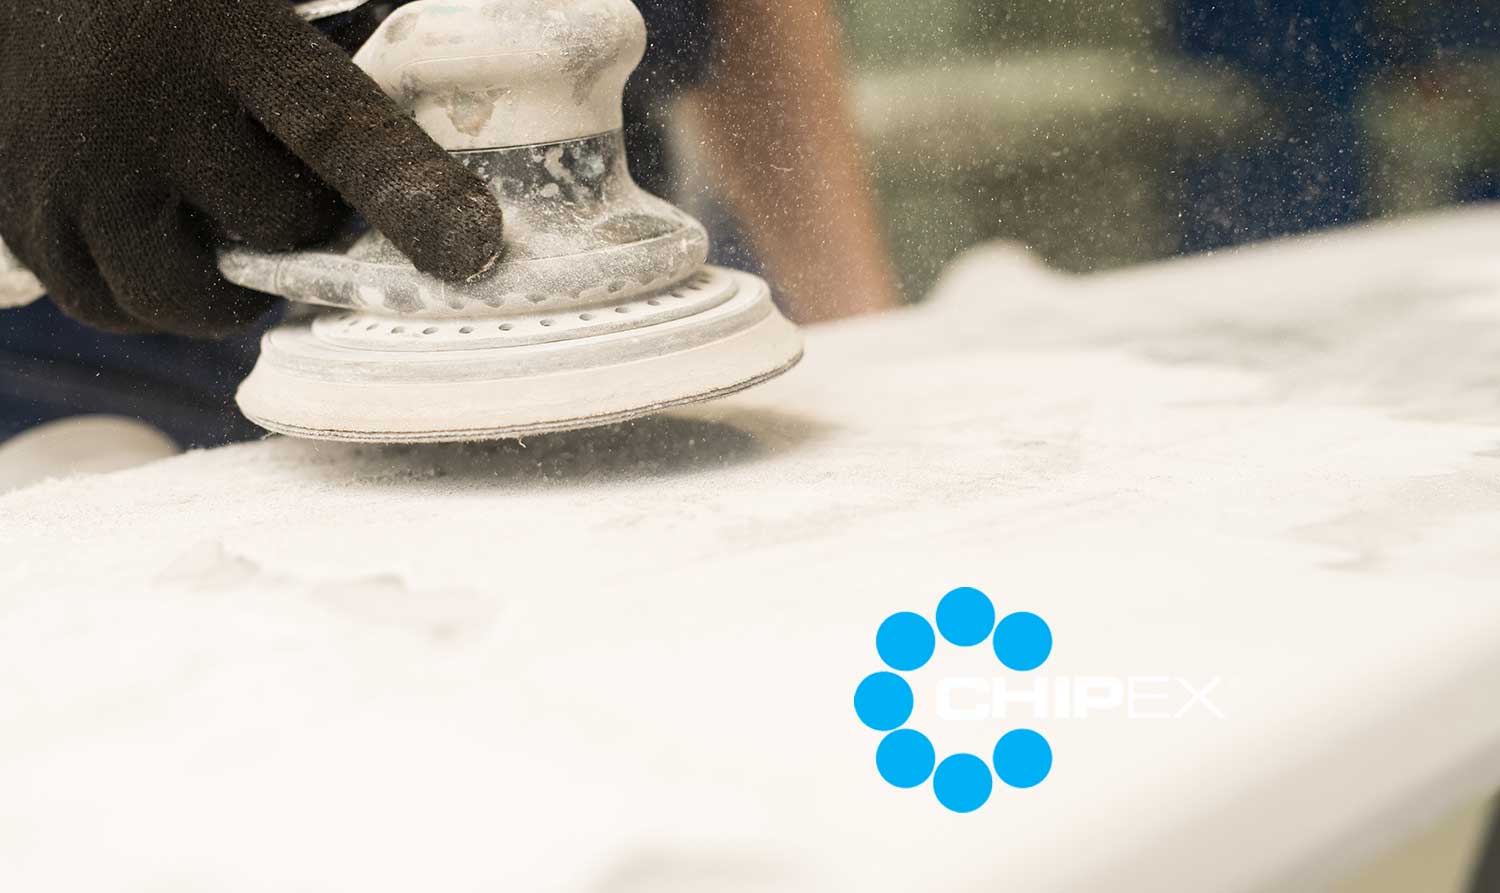
Using Sandpaper Properly
If your car does have rust, you must remove it before beginning anything else. You will want to use a coarser sandpaper (around 220 grit) to remove all traces of the rust, and then apply a rust preventative to keep it from returning.
Most car care professionals encourage wet sanding when working on your vehicle versus dry sanding. Dry sanding can create more scratches on your vehicle, while the use of water in wet sanding removes particles and paint dust as you sand, leaving your surface exceptionally smooth. Make sure that the sandpaper you purchase is specifically made for wet sanding.
For a touch up paint job, you will sand down through the basecoat to the primer. You can use a spray bottle to wet your vehicle as you sand or dip the sandpaper in a bucket of water. Use a back-and-forth motion when sanding, and don’t press in too hard. Rinse your sandpaper often to prevent buildup of residue that will scratch your surface.
Once you have a smooth, workable surface, wipe clean with a wet sponge, and allow to dry thoroughly before painting.
Sanding Between Paint Layers
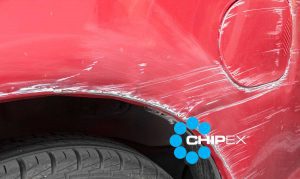
The goal of touching up car paint is to have a smooth, even surface without any lumps, bumps or raised areas. To determine whether to sand between layers, assess your project. Is this a small, insignificant scratch you need to fix or a scrape that covers a large area of your vehicle?
If you’re touching up a shallow scratch, sanding can be overkill. As long as there’s no exposed bare metal, and you still have the original primer, you won’t need to apply multiple layers of paint to fill in the damage. Lightly sand the primer, apply your basecoat, and allow it to dry. Finish with a layer of clear coat, and you’re good to go!
When applying multiple layers of paint, sanding between layers is only required if, after drying, you notice runs, drips, or uneven areas of your paint job. Building up paint over these imperfections will only make those raised areas more prominent. Apply your paint in light layers, allow to dry, and assess your work. If the surface is uneven, sand down those areas before applying another coat of paint. When sanding between basecoat layers, make sure each layer is totally dry before sanding, or you will end up with a gummy mess!
Once your paint job is complete, and you have applied your clear coat, wrap up with one last sand to give your vehicle a truly finished look. For best results, start with a lower grit sandpaper, and work your way higher for the smoothest surface possible. Buffing your car with polish either by hand or with an electric buffer completes the look!
Conclusion
Sanding your car throughout your paint job can be time consuming, but it is worth taking that time to create a smooth, level surface that matches the rest of your car. It may not be necessary for minor touch ups, but for most painting projects, sanding is an essential part of the task. A job well done means a less noticeable repair, and a car that’s ready to hit the road looking as good as new!
Search your car brand
brands

Can’t find your color code? enter your details manually here