Paint chips, sometimes called rock chips, are unfortunately fairly common. These small chips in your car’s or truck’s paint start off small and innocent enough. But if left as is, they can cause serious and costly damage to your vehicle. With time and weather exposure, a small paint chip will evolve into a rusty, corroded spot on your car that will need professional expertise to fix. Before it gets to that point, you can touch up your car paint chips yourself, saving time and money and restoring your car’s paint job to excellent condition.
Touching up car paint chips is simple. With a few tools and a little time, you can repair those chips and prevent further damage to your vehicle. Below, we give you a step-by-step guide to touching up paint chips on your own car. Let’s get started.
Search your car brand
brands
When Not to Try a DIY Paint Chip Repair
First thing’s first: there are some instances in which we recommend against a do-it-yourself approach to repairing paint chips. The most common circumstances include
- When the base metal is exposed
- When the damaged spot is rusting
- When you have multiple or very large chips
In all of these instances, your paint chip repair will only work temporarily. The underlying problem, like rust or a large area of damage, will eventually come through the touch up paint. If you’ve got a paint chip on your car that matches the above examples, save time and sweat and bring it in to the professionals. But in most cases, car paint chip repair is simple, effective, and inexpensive. Our DIY guide explains how you can get great results with at-home car paint chip repair.
Necessary Tools to Touch Up Car Paint Chips
Before you get started, you’ll need to take a trip to your automotive store and pick up a few items for your car paint chip repair. These three inexpensive items are all you need to repair nicks in your car’s paint.
-
Touch Up Paint
Your auto parts store carries everything you need to repair paint chips and get your car looking as good as new. At the counter, you’ll find a display of auto touch up paints. Find your car’s year, make, and model in the display. You will see a list of factory colors from the year your car was made, and if you know your car’s color number, you can select the correct touch up paint.
If you don’t know the color code for your car, you can usually find it inside the driver’s door jam. One code is for exterior paint and one is for interior paint. Once you’ve got the code, buy a bottle of touch up paint. If the store doesn’t have what you’re looking for, a quick call to the dealer will point you in the right direction.
-
Denatured Alcohol
Denatured alcohol works for prep cleaning your car before you repair paint chips. It. Includes solvents that remove dirt and grime from your car’s surface, helping your touch up paint to go on evenly and stick well.
-
Polishing Compound
A polishing compound provides a smooth finish after you’ve applied touch up paint to your car’s rock chips. It’s only mildly abrasive, unlike its counterpart, rubbing compound, so it leaves a smooth shine that makes it seems as if there was never a chip in your paint at all.
Once you’ve got these three tools in your arsenal, it’s time to get to work on those paint chips.
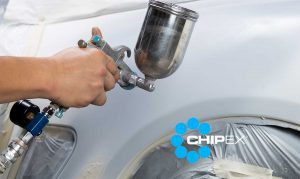
Touching Up the Car Paint Chip
On to the paint chip repair. Paint chips are unsightly. And unfortunately, they’re impossible to prevent. Your car can get chipped by simply following a truck that flings debris from its bed. But repairing this damage is easy, and you can do it right at home.
-
Clean the Chip
Before tackling any paint chip repair job, you need to clean the area first. To begin, thoroughly wash the problem area with a mild soap and water, then dry with a microfiber towel. Then, gently rub the area with the polishing compound. The slightly abrasive compound smooths out the jagged edges that come with paint chips.
When using the polish, don’t overdo it. A few seconds of rubbing should do the trick. If you go overboard with polishing the paint chip, you could damage your car’s clearcoat.
-
Rub with Denatured Alcohol
After the polish, rub the area with your denatured alcohol. Simply dampen a cloth and wipe the area a few times. The grime-fighting power of the solvent will ensure your car is clean and ready for the touch up paint.
-
Apply Primer
Now for the fun part. Using the primer, fill in the paint chip. Don’t flood the area, but paint the divot so that the primer barely touches the edge of the paint. After you’ve primed the paint chip, wait at least thirty minutes for everything to dry. Different touch up paints will have different drying times, so be sure to check the label for appropriate drying periods.
-
Paint the Chip
After the primer has totally dried, apply the touch up paint. We recommend practicing on a piece of paper before taking the paint directly to the primed paint chip. This will ensure you have control over the applicator and can paint the area with precision.
After it dries, apply another coat. Then allow the paint to cure according to the package label. You can bring back the polishing compound for one final shine to smooth out any rough edges. Then you’re done!
Conclusion
Paint chips are frustrating, especially because you don’t have control over when and where they happen. But as you can see from our guide, touching up paint chips is easy, inexpensive, and doesn’t take much time at all. If you find these chips early on before they rust or grow, this at-home repair strategy will preserve your car’s paint job for years!
Can’t find your color code? enter your details manually here