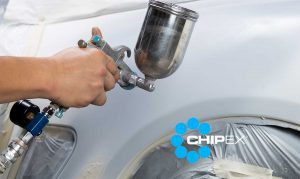
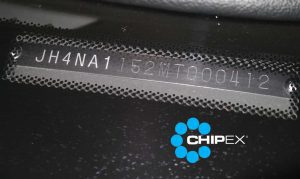
It happens to all of us—whether you open your car door into a pole, or your boisterous child accidentally whacks the side with a baseball bat, your car is bound to be on the receiving end of a scratch at some point or another. The moment paint is removed from your vehicle, there is risk of rust and other issues developing. When you notice a scratch or ding, you should address the situation as soon as possible.
Most scrapes and scratches can be fixed at home fairly easily and without you spending a lot of time or money. In this article, we will teach you the ins and outs of using acrylic paint to touch up your car.
Search your car brand
brands

Types of Acrylic Paints
You have a few options to choose from when looking for acrylic touch up paints for your vehicle:
- Acrylic lacquer
- Acrylic enamel
- Acrylic urethane
Each acrylic touchup option has its own requirements for mixing and applying, and it’s a good idea to consult your owner’s manual, a dealer, or your local car expert to determine the right choice for your vehicle. You’ll want to match your touch-up paint to your car’s base paint color. In addition, some paints are specially formulated for certain temperatures and humidity levels, so be sure to check the product labels for specific information as you determine your choice of paint.
Acrylic Lacquer
Most body shop professionals consider acrylic lacquer a bit outdated. You typically only use this acrylic option when touching up older cars. Lacquer doesn’t last as long as other acrylic options, wearing easily when exposed to sun or chemicals. Plus, it is illegal in some places, so be sure to look up your state’s regulations.
Acrylic Enamel
Acrylic enamel is long lasting and gives the car a smooth finish. You have two options for using an acrylic enamel touch up paint: a single stage, which dries to a shiny finish on its own; and a two-stage, which includes a base layer and a clear topcoat. The topcoat grants extra protection while giving the car a professional-looking gloss.
Acrylic Urethane
Acrylic urethane is generally the easiest acrylic touch-up paint to apply and is also the most durable. While weather, use, and other factors may vary, urethane finishes can last up to five to ten years longer than an enamel finish. Acrylic urethane is also less prone to fading, chipping, and flaking.
Each of these options present their own pros and cons and require personal research to determine the best option for your vehicle.
Search your car brand
brands

Before You Begin
It is very important to take the necessary precautions before beginning any painting project on your car. Carefully read through all instructions and warnings on each product you are using. Automotive paints are hazardous and require protective gear and proper working space.
Gloves, respirators, and goggles are all important pieces of protective gear. Consider wearing old clothing that covers any exposed skin to protect yourself from chemicals. Additionally, make sure that children and pets are kept well away from your working area.
Although you may want to take your paint job outside, it is better to have a properly ventilated but enclosed environment, such as a garage or shed, as humidity and dampness significantly affect acrylic touchup paints.
Ensure you have enough room to move around easily as well as space for your tools and painting equipment. If you must be outside, take care to avoid painting in direct sunlight or in temperatures higher than 90 degrees Fahrenheit.
Application Process
While some general application steps apply to most touch up jobs, depending on your choice of paint, the application process will vary. Read through all the instructions included on your product carefully, make sure you have all the tools necessary for the job, and take your time!
It’s a good idea to do a “test run” of your paints and application tools on a scrap piece of metal before painting the car itself. This will give you a feel of your applicator and paint, and if you make a mistake, it won’t be on your car!
Prepare Surface Area
Before beginning, make sure to prep your surface area. This is a crucial step in any paint job, as rust or dirt can prevent the paint from sticking to the vehicle. The moment you have a scratch or other damage that removes the color from your vehicle, the clear coat that protects the vehicle is gone, and your car is easily susceptible to rust.
Protect Your Car
Use plastic sheeting or some other protective covering to mask off the areas of your car you don’t want affected by your project. Leave a few inches of working space on all sides of the area you are painting. Clean the area with an automotive soap, and rinse and dry thoroughly.
If your vehicle has developed rust, remove it with sandpaper or use an orbital sander. Using a gentle grit paper, sand out the rust spot. Then paint directly around the area where the rust was present until there is no more rust, and you see only the shiny base metal. Clean again with soap and water, dry, and apply rust protection.
Begin Painting
Apply primer to the entire exposed area where no paint is seen. Allow this to dry completely per the primer’s instructions. After your primer has fully dried, you can apply your base coat.
Some paints require you to mix them with a thinner, hardener, or activator before applying. Apply in multiple thin coats until your paint level lines up with the existing paint on your car. Allow this base coat to dry as recommended, or overnight.
Once the base coat has dried, you will want to apply a clear coat over the entire area. This gives your project its finished look and shine while sealing and protecting your work. You may have to mix in a hardener with your clear coat, so be sure to read the instructions and ratios required.
You will want to apply your clear coat in thin layers, allowing each layer to dry completely on its own before applying another coat. Apply gently so as not to damage the base coat.
Conclusion
As you can see, whether you drive a Ford or a Ferrari, acrylic touchup paint is a great option for your car’s scratches. By following our guide, you can successfully repair minor damage to your car right at home. It may take a little time and effort, but it’s all worth it to see your vehicle looking good as new and to know you’ve taken the steps to protect your vehicle from rust and further damage.
Can’t find your color code? enter your details manually here
